This guide will walk through how to use the new Multi-Entity support for Intacct Document Flow users. Intacct Top Level allows for users to code invoices to any Entity configured in Intacct within a single hh2 site.
NOTE: This is only for Document Flow. This does not apply to Remote Payroll. At this time Remote Payroll only support exporting to a single Entity per hh2 site.
Sync Client Setup
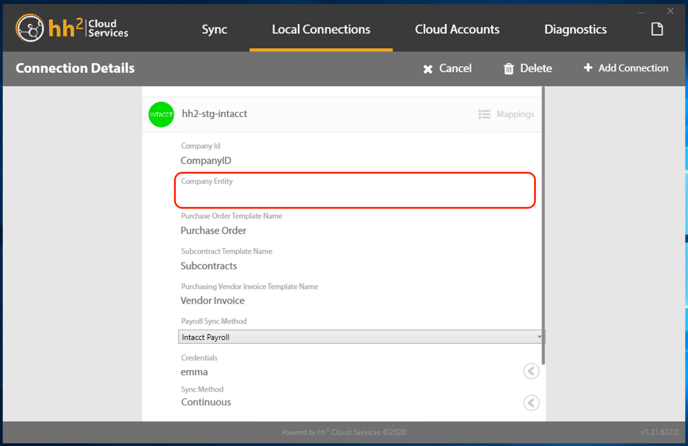
First you will want to make sure your Sync Client does not have a Company Entity selected so that we can pull all Entities and their relational data into hh2.
-
Open the Sync Client used to connect your hh2 site to Sage Intacct
-
Under the Local Connections tab
-
If you are already using hh2 with Intacct, click the Edit button next to the correct connection
-
Otherwise add a new connection using the Add Connection button
-
Fill out all fields as needed based on your hh2 subscription but leave the Company Entity field blank.
Adding the Entity Header Field
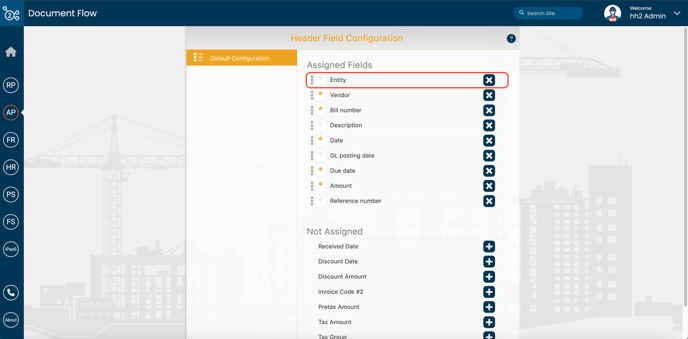
Once the Sync Client has been configured, AP Admins will want to add the Entity field to their list of coding available within the Header of the Invoice.
-
AP
-
Open the Header Fields page
-
Click the + button next to Entity so it is listed under the Assigned Fields column.
Coding an Invoice
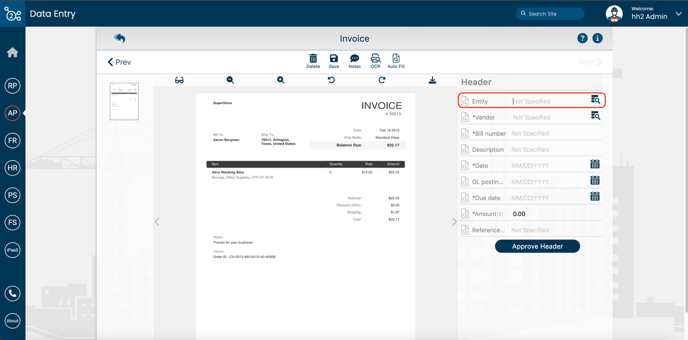
Users will now notice additional data available for coding selection within Invoices.
-
Open an Invoice
-
Users with permission to Edit an Invoice’s header coding can select the Entity in which the Invoice will be exported to
-
Selecting an Entity, will also filter the Vendor, Location, Job, and Expense Account coding available for selection to only those either shared at the Top Level or private coding configured for the specific Entity.
*Note: If Top Level is selected for the Entity coding field, then only “Shared” coding (aka coding accessible to all Entities) will be available for selection.
*Tip: If no Entity is selected, upon selecting private coding for a specific Entity (Vendor, Location, Job, or Expense Account) the Entity will automatically populate within the header coding field.
Exporting an Invoice
Before exporting an invoice, AP Managers will want to make sure the following coding has been filled out for a successful export into Sage Intacct:
-
Header: Vendor
-
Header: Bill Number
-
Header: Invoice Date
-
Header: Due Date
-
Header: Amount
-
Distribution: Expense Account if not defaulted on the vendor
-
Distribution: Amount
The Entity selected in the header coding will determine which Entity the invoice will be entered in upon export out of hh2.
If no Entity is selected (either manually or by default), the Invoice will be entered into Top Level.
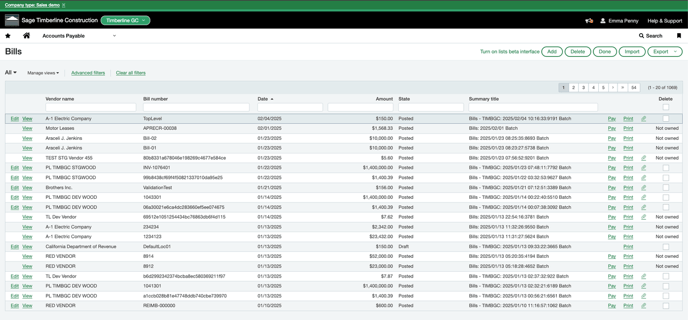
Once an Invoice has been exported out of hh2, it can be viewed within Sage Intacct by:
-
Select the Entity in which the invoice was coded to
-
Open the Applications menu
-
Accounts Payable
-
Bills
-
Click View or Edit on the invoice line item